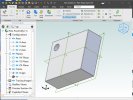
You will notice that you are in an assembly. What you are creating is an assembly sketch. Assembly sketches are owned by the top level assembly and have limited uses, compared to sketches in parts.
Instead, Select the New Part icon. This creates an additional part in the assembly and enters you "part mode" automatically. There, you see all the familiar tools like Extrude, Revolve, etc. Make your sketch there instead, and use whatever features you like.
Now, you need to exit part mode and go back to the assembly. Do this by right-clicking the top-most node in the Explorer, which is the assembly node. Select Edit Part/Subassembly. You'll notice the ribbon changes and you see assembly-related stuff.
Using this right-click method you can open and edit various parts, subassemblies, or the root assembly as you like. You will notice that the right-click method provides 2 options (on nodes that aren't the root assembly): Edit Here and Edit in Separate Window.
Edit Here opens the part context but keeps all the other parts of the assembly in the view. This approach can be useful with small assemblies or when you need to edit parts that are referencing other parts. Edit in Separate Window opens a new window with just the part you are modifying. This approach is useful with assemblies that have more parts, and thus a higher chance of parts being in the way of the part you're trying to modify.
If you use "Edit in Separate Window", to leave the editing session just close the new window that pops up and you'll see your changes are now reflected in your assembly.