If you read the Keyshot Help>About, you will see that the CAD import has been licensed from SIMLAB. And Simlab license the rendering from Luxion.
There is a small problem when importing a STEP file as the sub-assembly structure is not retained. But I have sent them two sample models, and from my post in their forum, they will be working on fixing that as well. In the meantime you can use the ALT + LeftClick and Drag to recreate the assembly structure again in Simlab. The Alibre to SketchUp exporter had the same problem.
With a STEP import, you can modify all faces individually. You can also Publish a 3D PDF from Alibre, and all the parts, configurations and assemblies will be retained perfectly. The only problem is that you can only texture the by part and not face, but that is often enough. That is a 3D PDF, and not just the U3D exported from the PDF. You can also output another 3D PDF with more options from Simlab. I prefer sending 3D PDF's to clients for review. Now you can texture the 3D PDF, and send a wood grain, or other textured model to the client. The display is not quite the quality of a rendering, but you can also send along fixed renders as the cover image or in addition to the 3D PDF. Just use the Alibre PDF printer to convert the static image output from Simlab to a PDF and specify that image to be included before the 3D PDF.
I use AP214 STEP files to import into Simlab, and you can modify the current material assignments.
The Simlab forum is very responsive (at least from Pacific Time) and rapidly answer questions not covered in the manual. They seem really interested in customer support and responding to their forum inquiries. v2.0 is just the start for some interesting enhancements. They hope to be able to handle individual face texturing in all formats, and not just STEP imports. Add the suggestion to the forum about background images. I would set the rendering settings to a low level during positioning, and up them after the positioning is correct.
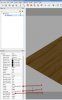
Use the Tools > Generate Texture Coordinates to rapidly modify textures and placement, and modify colors, reflectivity in the Properties window. Use Tools > Precise Transformation to rotate imported STEP models 90 degrees about the X axis to stand them up, and then snap to ground. A day or two playing with all the options on the interface, and I pretty much had things figured out.
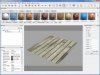
The "back offset" in my Alibre model for the curved shelves is the distance from the radius center. So with a 36" radius and 27" back offset, the shelf depth is 36 - 27 = 9" at its deepest.
 )This trial licence provides full functionality, but allows only a limited number of renders to be generated - 30 from memory.